
Transaction:
1st step: create
purchase Requisition
Path:- see below screen (left)

Provide the item and quantity
and need by date then save (Requisition number will generate)
Then click on Approve tab and following screen will
appear

Then convert this requisition to
PO through auto create. See the below screen
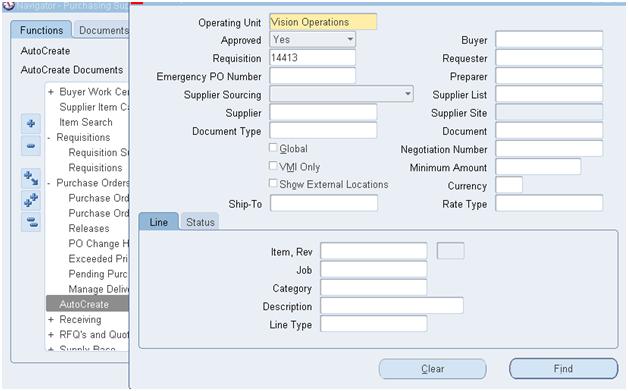
Remove the buyer name and
provide requisition number and click on find tab

Tick on requisition and click on
automatic tab and below screen will appear.

Provide the supplier name

Then click on create tab .It
will automatically create a PO on behalf of that Requisition.
Step 2 : Creation of PO

Above screen is the PO. Click on
shipment tab and below screen will appear

Here provide match approval Level as
2way = PO Quantity vs. Invoice
Quantity
3way = Po Quantity vs. Receipt Quantity
vs. Invoice Quantity
4way = PO Quantity vs. Receipt Quantity
vs. Invoice Quantity vs. Inspection Quantity
Then click on Receiving controls tab

Provide Receipt routing as
direct delivery, Inspection required and Standard receipt which one required
for the client.

Then click on Distribution and
provide the PO charge account if it is not picking from Item else organization set
up.

Click on Term tab on Po screen
and provide Pay on = Receipt for transacting ERS invoice creation.

Now the PO has created
completely.

Then click on approve tab

Click on OK .Here if the PO
approval is required for more than one person then click on forward the
approval path to concern person otherwise else.

Now you see the status on PO is
showing Approve which was Status as
Incomplete.
Step 3 : Creation of Receipt
Path:- See the below screen
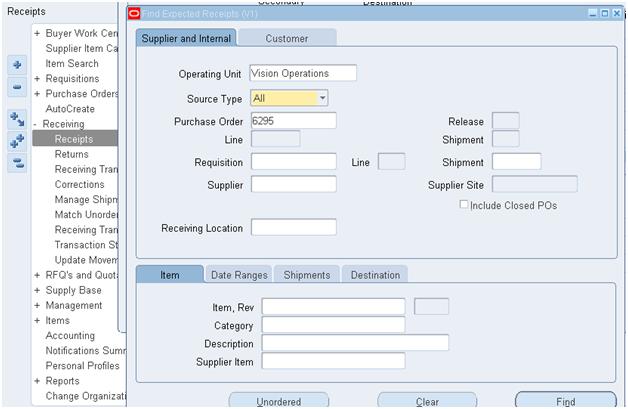
Provide the PO number and click
on find tab

Here provide details of shipment
if client required to capture the info.

Tick on Receipt and Save. Click
on Header tab You can see the receipt number generated.

Step 4: Receiving Transaction
summary

Provide the Po
else Receipt number and click on find ,the above screen will appear.See the
routing is showing Inspection required.
Step 5:
Receiving Transaction

Provide the PO Number and click
on find tab.

Tick the receipt to inspect and Click
on inspect
Then run the request to make the
Receipt in to Auto invoice.

Provide the receipt number and
submit request. Go to request and view the invoice number generated.
Take that Invoice number and go
to payable invoice screen
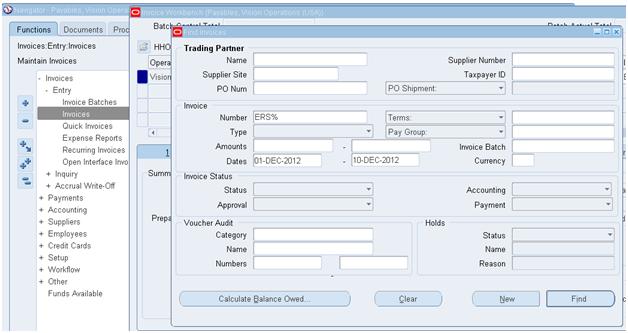
Click on find button and provide
ERS%invoice number% and find

Then validate the same invoice
by clicking on Action tab.

Then Create Accounting the same
invoice by clicking on Action tab.
Draft = It will impact to only
sub ledger tables neither GL table. Any time we want we can delete this entry
and we can change and post to GL.
Final = It will impact to GL
table but without post.
Final Post = It will impact to
GL table and post.

Step 6 : Make Payment
Then pay in full the same
invoice by clicking on Action tab.

Below screen will appear.

Provide the payment method and
payment process profile and save.

Then Create Accounting the same
Payment by clicking on Action tab.

See the below screen for sub
ledger level entry

Once we will run create
accounting these request will run to impact the GL balances.

Then Go to GL responsibility
=> Journal

Once it will come to GL balance
then It will reflect in Trial balance.